這篇是我在 Homelab 用 RHEL 10.1 + KVM 切虛擬機,從零開始走完一遍 OpenShift 4.18 UPI(User Provisioned Infrastructure)c安裝的紀錄。UPI 相對於 IPI 的差別在於所有底層基礎設施:DNS、Load Balancer、HTTP Web Server、節點 都要自己準備,在雲端可以透過 Cloud Provider 自動搞定,安裝不難,但是需要耐心和細心。
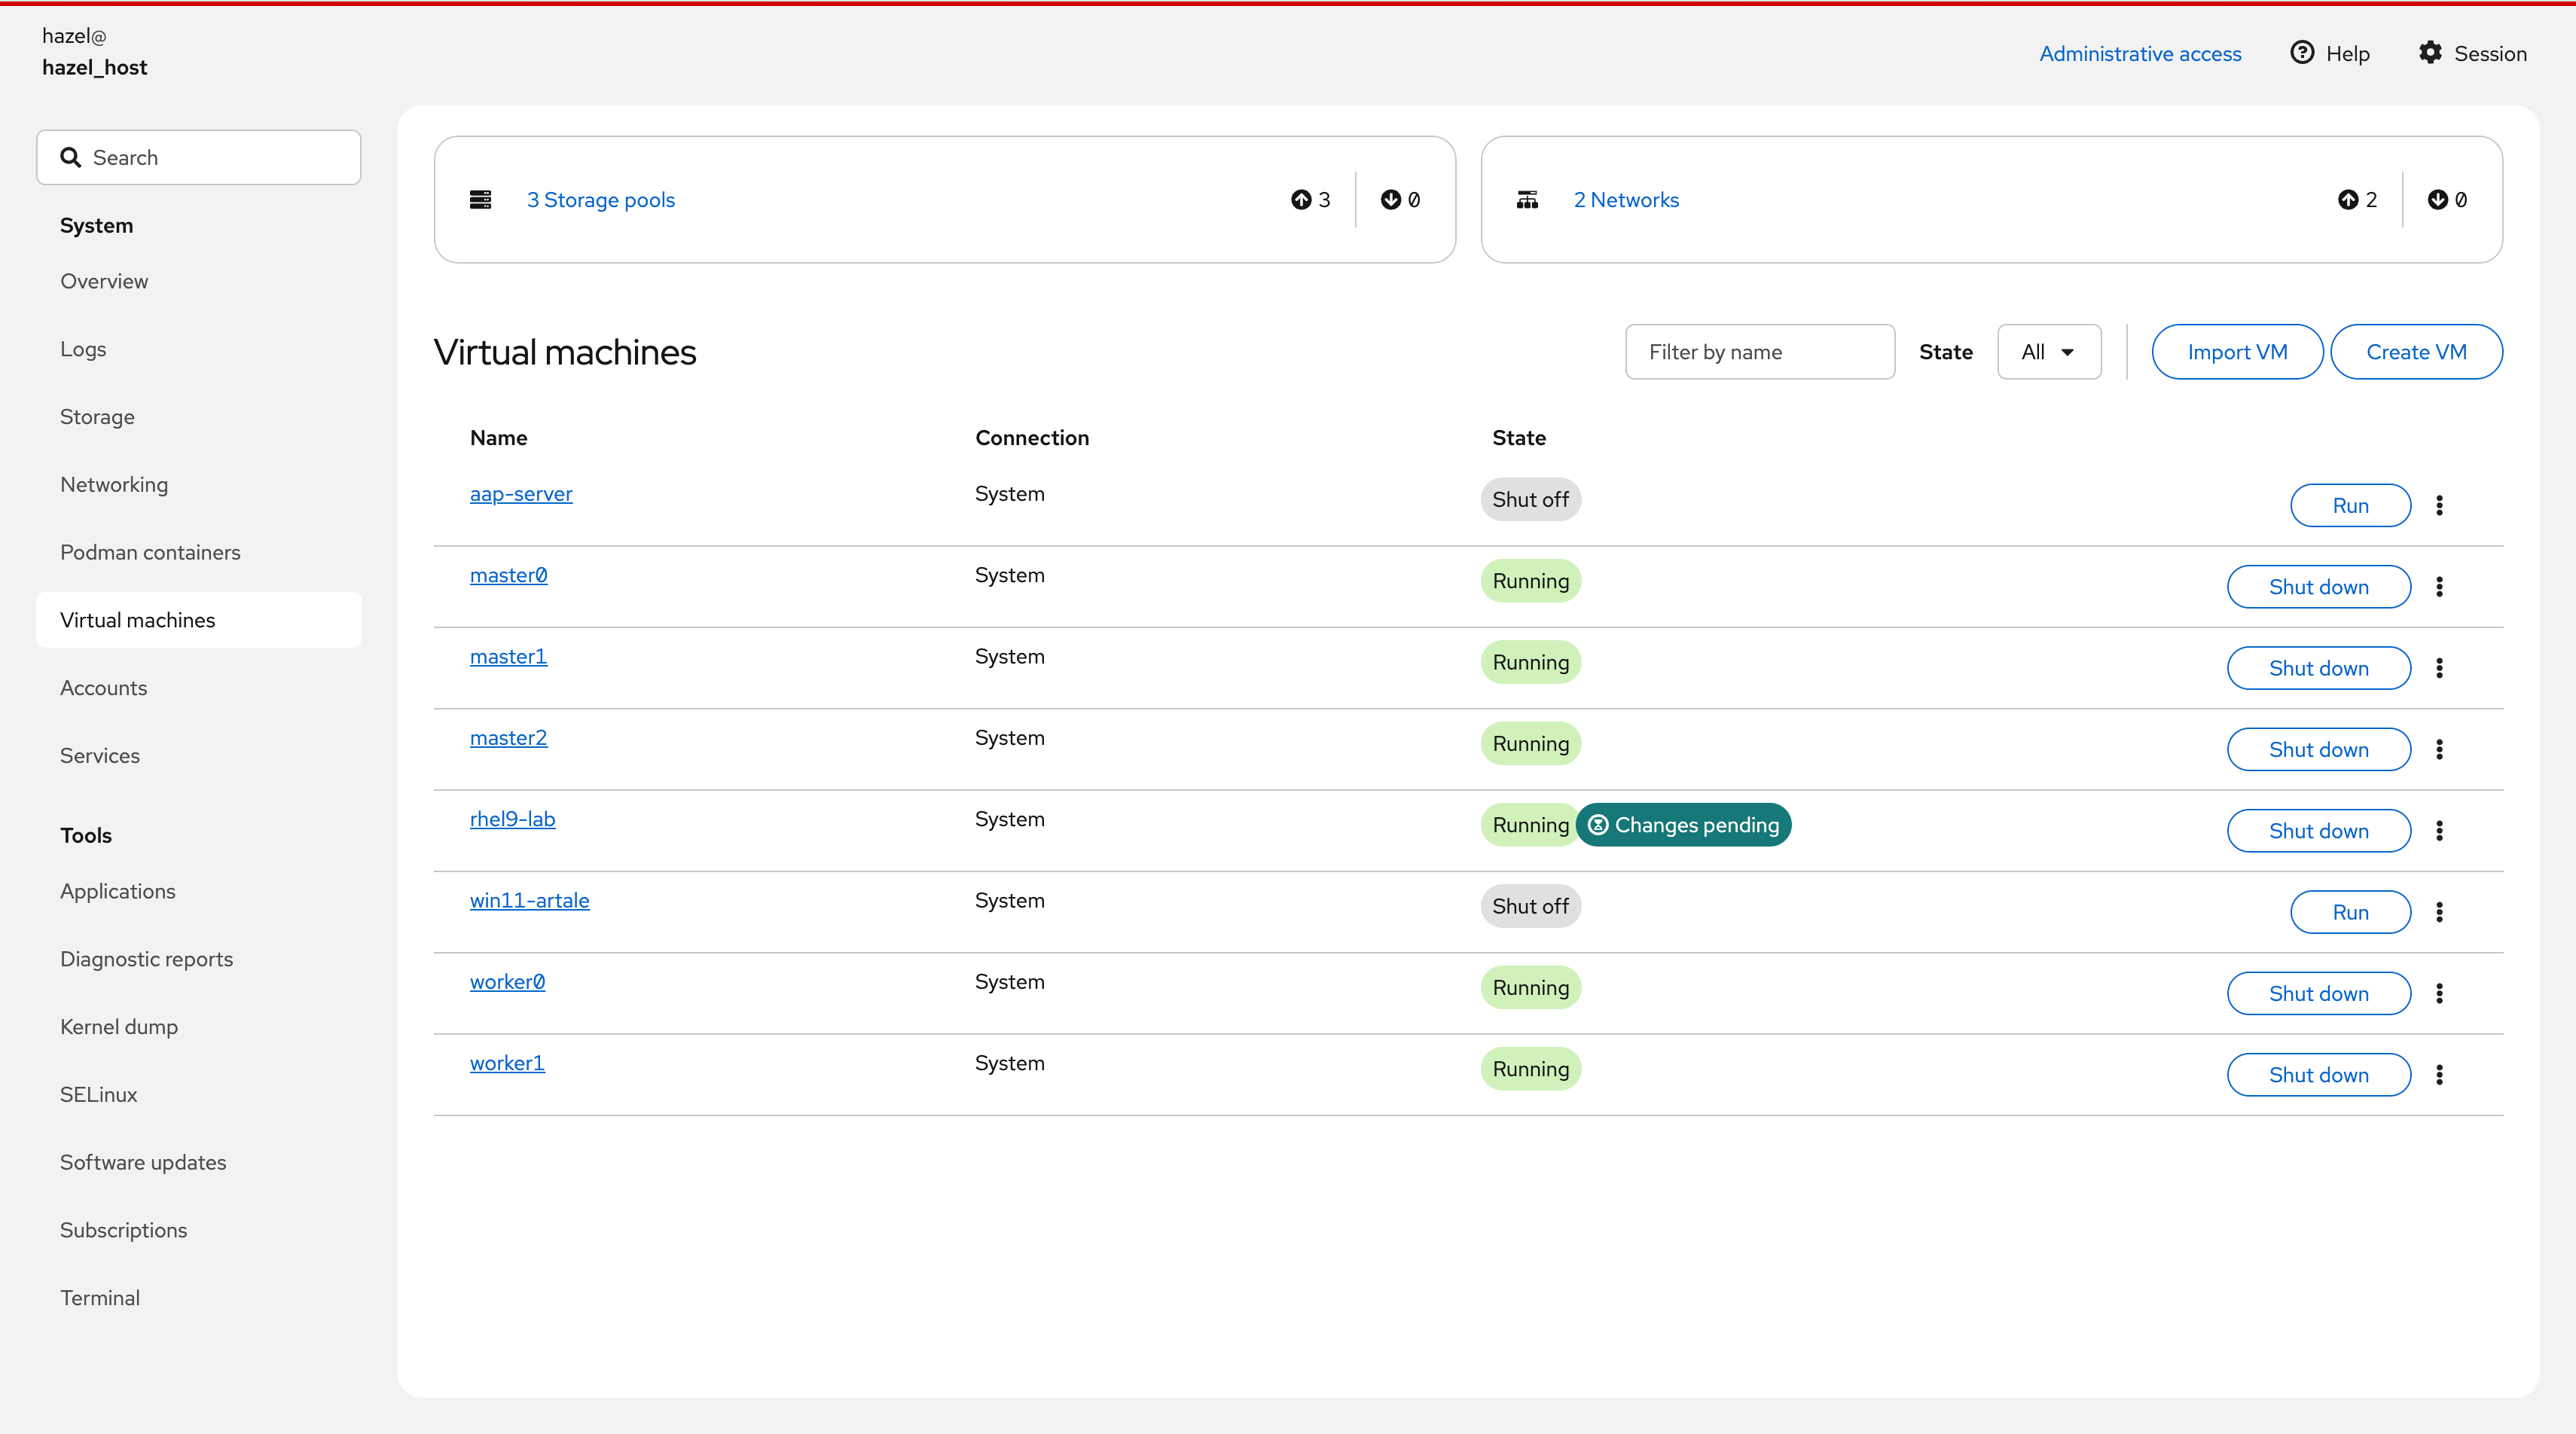
首先先在宿主機安裝 RHEL10.1,然後把 cockpit裝起來,就可以得到一個蠻精美的 RHEL 管理介面。
![]()
再來把虛擬化的相關套件裝起來,就可以用 virt 新增和管理虛擬機。
1
2
3
4
5
|
sudo dnf module install virt
sudo dnf install qemu-kvm libvirt virt-install
|
叢集設計規劃
整座叢集域名為 ocp4.hazel.com,Bastion 機(rhel9)身兼 DNS、HAProxy、HTTP Server,所有對外 URL 都打進 Bastion 機上面的 HAProxy 再轉發。
| 節點 |
IP |
角色 |
資源配置 |
rhel9(Bastion) |
192.168.0.33 |
DNS / HAProxy / HTTP Server |
2 vCPU / 3 GB Memory (超極限壓榨) |
bootstrap |
192.168.0.100 |
臨時安裝節點(安裝完銷毀) |
4 vCPU / 8 GB Memory |
master0~2 |
192.168.0.101~103 |
Control Plane(etcd、API Server) |
4 vCPU / 16 GB Memory (後來我調整成 24 GB Memory ) |
worker0~1 |
192.168.0.104~105 |
Worker(Ingress、App Pods) |
4 vCPU / 16 GB Memory |
常用組件存取 URL:
| 用途 |
URL |
| API |
https://api.ocp4.hazel.com:6443 |
| Web Console |
https://console-openshift-console.apps.ocp4.hazel.com |
| OAuth |
https://oauth-openshift.apps.ocp4.hazel.com |
階段一:基礎設施準備
切割磁碟、DNS、Load Balancer (HA Proxy)、HTTP Server 都會需要先準備好
Bastion 機的建立過程可以參考 這篇。本篇不就 KVM 的操作多加說明。
磁碟分割
- 列出宿主機上面可以用的磁碟,那顆 2TB 的磁碟就是給 OpenShift 和其他應用程式用的資料碟
1
2
3
4
5
6
7
8
9
10
| hazel@hazel-host:/var/lib/libvirt/images$ lsblk
NAME MAJ:MIN RM SIZE RO TYPE MOUNTPOINTS
nvme0n1 259:0 0 1.9T 0 disk
nvme1n1 259:1 0 476.9G 0 disk
├─nvme1n1p1 259:2 0 600M 0 part /boot/efi
├─nvme1n1p2 259:3 0 1G 0 part /boot
└─nvme1n1p3 259:4 0 475.4G 0 part
├─rhel-root 253:0 0 70G 0 lvm /
├─rhel-swap 253:1 0 32G 0 lvm [SWAP]
└─rhel-home 253:2 0 373.4G 0 lvm /home
|
- 執行以下步驟,劃分出給虛擬機用的磁碟空間
1
2
3
4
5
6
7
8
9
10
11
12
13
14
15
| # 1. 建立 GPT 分割表並切出 1TB 的空間 (nvme0n1p1)
sudo parted -s /dev/nvme0n1 mklabel gpt
sudo parted -s /dev/nvme0n1 mkpart primary xfs 0% 1TB
# 2. 【只對這個 1TB 的分割區】進行格式化
sudo mkfs.xfs /dev/nvme0n1p1
# 3. 建立目錄並掛載這個分割區
sudo mkdir -p /mnt/ocp-data
sudo mount /dev/nvme0n1p1 /mnt/ocp-data
# 4. 寫入 fstab 與設定 KVM 權限
echo '/dev/nvme0n1p1 /mnt/ocp-data xfs defaults 0 0' | sudo tee -a /etc/fstab
sudo chown qemu:qemu /mnt/ocp-data
sudo chmod 750 /mnt/ocp-data
|
- 用 lsblk 確認有看到 nvme0n1p1 掛載在 /mnt/ocp-data 上
1
2
3
4
5
6
7
8
9
10
11
| hazel@hazel-host:/var/lib/libvirt/images$ lsblk
NAME MAJ:MIN RM SIZE RO TYPE MOUNTPOINTS
nvme0n1 259:0 0 1.9T 0 disk
└─nvme0n1p1 259:5 0 931.3G 0 part /mnt/ocp-data
nvme1n1 259:1 0 476.9G 0 disk
├─nvme1n1p1 259:2 0 600M 0 part /boot/efi
├─nvme1n1p2 259:3 0 1G 0 part /boot
└─nvme1n1p3 259:4 0 475.4G 0 part
├─rhel-root 253:0 0 70G 0 lvm /
├─rhel-swap 253:1 0 32G 0 lvm [SWAP]
└─rhel-home 253:2 0 373.4G 0 lvm /home
|
DNS:安裝 BIND
⚠️ 這個階段會需要細心配置,DNS 沒解析好後面安裝過程有可能出錯。
1
| sudo dnf install bind bind-utils -y
|
修改 /etc/named.conf 的 options 區塊:
1
2
3
| listen-on port 53 { any; };
allow-query { any; };
recursion yes;
|
在設定檔最下方加入 zone 定義:
1
2
3
4
5
| zone "ocp4.hazel.com" IN {
type master
file "ocp4.hazel.com.zone"
allow-update { none
}
|
新增 Zone File /var/named/ocp4.hazel.com.zone:
⚠️ 每次修改後 Serial 必須 +1,不然 DNS 不會更新。
1
2
3
4
5
6
7
8
9
10
11
12
13
14
15
16
17
18
19
20
21
22
23
24
25
26
27
28
| $TTL 1W
@ IN SOA ns1.ocp4.hazel.com. root.ocp4.hazel.com. (
2026021901
1D
1H
1W
1D )
@ IN NS ns1.ocp4.hazel.com.
ns1 IN A 192.168.0.33
api IN A 192.168.0.33
api-int IN A 192.168.0.33
*.apps IN A 192.168.0.33
bootstrap IN A 192.168.0.100
master0 IN A 192.168.0.101
master1 IN A 192.168.0.102
master2 IN A 192.168.0.103
worker0 IN A 192.168.0.104
worker1 IN A 192.168.0.105
_etcd-server-ssl._tcp IN SRV 0 10 2380 master0.ocp4.hazel.com.
_etcd-server-ssl._tcp IN SRV 0 10 2380 master1.ocp4.hazel.com.
_etcd-server-ssl._tcp IN SRV 0 10 2380 master2.ocp4.hazel.com.
|
啟動並讓 Bastion 優先查自己的 DNS:
1
2
3
4
5
| sudo systemctl enable --now named
sudo sed -i '1i nameserver 127.0.0.1' /etc/resolv.conf
dig +short api.ocp4.hazel.com @192.168.0.33
|
HAProxy:Load Balancer
⚠️ SELinux 預設會擋住 HAProxy 綁定 6443、22623 這類非標準 Port,沒開這個boolean 值 HAProxy 啟動可能導致失敗。
1
2
| sudo dnf install haproxy -y
sudo setsebool -P haproxy_connect_any 1
|
清空 /etc/haproxy/haproxy.cfg 後貼入以下設定:
1
2
3
4
5
6
7
8
9
10
11
12
13
14
15
16
17
18
19
20
21
22
23
24
25
26
27
28
29
30
31
32
33
34
35
36
37
38
39
40
41
42
43
44
45
46
47
48
49
50
51
52
53
54
55
56
57
58
59
60
61
62
63
64
65
66
67
68
69
70
71
72
73
74
75
76
77
78
79
| global
log 127.0.0.1 local2
chroot /var/lib/haproxy
pidfile /var/run/haproxy.pid
maxconn 4000
user haproxy
group haproxy
daemon
stats socket /var/lib/haproxy/stats
defaults
mode tcp
log global
option tcplog
option dontlognull
retries 3
timeout queue 1m
timeout connect 10s
timeout client 1m
timeout server 1m
timeout check 10s
maxconn 3000
# 監控儀表板(Port 9000)
listen stats
bind :9000
mode http
stats enable
stats uri /
# API Server
frontend ocp_api
bind :6443
default_backend ocp_api_backend
backend ocp_api_backend
balance source
option tcp-check
# ⚠️ 安裝完成後將 bootstrap 這行註解掉
server bootstrap 192.168.0.100:6443 check
server master0 192.168.0.101:6443 check
server master1 192.168.0.102:6443 check
server master2 192.168.0.103:6443 check
# Machine Config Server(節點開機抓 Ignition 用)
frontend ocp_mcs
bind :22623
default_backend ocp_mcs_backend
backend ocp_mcs_backend
balance source
option tcp-check
# ⚠️ 安裝完成後將 bootstrap 這行註解掉
server bootstrap 192.168.0.100:22623 check
server master0 192.168.0.101:22623 check
server master1 192.168.0.102:22623 check
server master2 192.168.0.103:22623 check
# Ingress HTTP
frontend ocp_http
bind :80
default_backend ocp_http_backend
backend ocp_http_backend
balance source
option tcp-check
server worker0 192.168.0.104:80 check
server worker1 192.168.0.105:80 check
# Ingress HTTPS
frontend ocp_https
bind :443
default_backend ocp_https_backend
backend ocp_https_backend
balance source
option tcp-check
server worker0 192.168.0.104:443 check
server worker1 192.168.0.105:443 check
|
開防火牆並啟動:
1
2
3
4
5
6
7
8
| sudo firewall-cmd --add-port=6443/tcp --permanent
sudo firewall-cmd --add-port=22623/tcp --permanent
sudo firewall-cmd --add-port=80/tcp --permanent
sudo firewall-cmd --add-port=443/tcp --permanent
sudo firewall-cmd --add-port=9000/tcp --permanent
sudo firewall-cmd --reload
sudo systemctl enable --now haproxy
|
HTTP Server:放置 Ignition 檔案
Bootstrap、Master、Worker 開機時會透過 HTTP 拉 .ign 檔,這台 Server 就是用來放那些檔案的。Port 80 已被 HAProxy 佔用,改用 8080。
1
2
3
4
5
6
7
| sudo dnf install httpd -y
sudo sed -i 's/^Listen 80/Listen 8080/' /etc/httpd/conf/httpd.conf
sudo firewall-cmd --add-port=8080/tcp --permanent
sudo firewall-cmd --reload
sudo systemctl enable --now httpd
|
安裝 OpenShift 4.18 工具
1
2
3
4
5
6
7
8
9
10
11
12
| export OCP_VERSION="stable-4.18"
wget https://mirror.openshift.com/pub/openshift-v4/clients/ocp/$OCP_VERSION/openshift-install-linux.tar.gz
wget https://mirror.openshift.com/pub/openshift-v4/clients/ocp/$OCP_VERSION/openshift-client-linux.tar.gz
tar -zxvf openshift-install-linux.tar.gz openshift-install
tar -zxvf openshift-client-linux.tar.gz oc kubectl
sudo mv openshift-install oc kubectl /usr/local/bin/
rm -f openshift-install-linux.tar.gz openshift-client-linux.tar.gz
openshift-install version
|
生成 Ignition 設定檔
1. 準備 SSH 公鑰
1
2
| ssh-keygen -t ed25519 -N '' -f ~/.ssh/id_ed25519
cat ~/.ssh/id_ed25519.pub
|
2. 取得 Pull Secret
前往 Red Hat Hybrid Cloud Console 複製 JSON 格式的 Pull Secret。
3. 建立 install-config.yaml
⚠️ Ignition 檔案有效期限只有 24 小時,生成後要盡快完成安裝。
1
| mkdir -p ~/ocp-install && cd ~/ocp-install
|
1
2
3
4
5
6
7
8
9
10
11
12
13
14
15
16
17
18
19
20
21
22
23
| apiVersion: v1
baseDomain: hazel.com
compute:
- hyperthreading: Enabled
name: worker
replicas: 0
controlPlane:
hyperthreading: Enabled
name: master
replicas: 3
metadata:
name: ocp4
networking:
clusterNetwork:
- cidr: 10.128.0.0/14
hostPrefix: 23
networkType: OVNKubernetes
serviceNetwork:
- 172.30.0.0/16
platform:
none: {}
pullSecret: '...貼上完整的 Pull Secret...'
sshKey: 'ssh-ed25519 AAAAC3NzaC1lZDI1NTE5AAAAI... hazel@rhel9'
|
4. 備份安裝設定檔案並生成對應節點 ign 檔案
⚠️ openshift-install 執行後會自動刪除 install-config.yaml,沒備份就只能重頭來過。
1
2
| cp install-config.yaml install-config.yaml.bak
openshift-install create ignition-configs --dir=./
|
執行後產出:
| 檔案 |
用途 |
bootstrap.ign |
Bootstrap 節點開機設定 |
master.ign |
Master 節點開機設定 |
worker.ign |
Worker 節點開機設定 |
auth/kubeconfig |
oc 指令用憑證 |
auth/kubeadmin-password |
⚠️ Web Console 登入密碼,請妥善保管 |
5. 上傳 ign 檔案至 HTTP Server,並開通防火牆
1
2
| sudo cp ~/ocp-install/*.ign /var/www/html/
sudo chmod 644 /var/www/html/*.ign
|
1
2
3
4
5
6
7
8
9
| sudo firewall-cmd --add-service=dns --permanent
sudo firewall-cmd --add-port=53/udp --permanent
sudo firewall-cmd --add-port=53/tcp --permanent
sudo firewall-cmd --add-port=22623/tcp --permanent
sudo firewall-cmd --add-port=6443/tcp --permanent
sudo firewall-cmd --add-port=8080/tcp --permanent
sudo firewall-cmd --add-port=80/tcp --permanent
sudo firewall-cmd --add-port=443/tcp --permanent
sudo firewall-cmd --reload
|
階段二:節點開機與安裝(OS 層級)
下載 RHCOS Live ISO
1
2
3
| wget https://mirror.openshift.com/pub/openshift-v4/dependencies/rhcos/4.18/latest/rhcos-live.x86_64.iso
sudo mv ~/Downloads/rhcos-live.x86_64.iso /var/lib/libvirt/images/
sudo chown qemu:qemu /var/lib/libvirt/images/rhcos-live.x86_64.iso
|
建立 KVM 虛擬機並安裝 RHCOS
以 Bootstrap 為例:
1
2
3
4
5
6
7
8
9
10
| sudo virt-install \
--name bootstrap \
--vcpus 4 \
--memory 16384 \
--disk path=/mnt/ocp-data/bootstrap.qcow2,size=120,format=qcow2,bus=virtio \
--network bridge=br-vm,model=virtio \
--cdrom /var/lib/libvirt/images/rhcos-live.x86_64.iso \
--os-variant rhel9.0 \
--graphics vnc,listen=0.0.0.0 \
--noautoconsole
|
查出 VNC Port 後用 VNC 連進去,在 Live 環境執行安裝:
1
| sudo virsh vncdisplay bootstrap
|
1
2
3
4
5
6
7
8
9
10
11
12
13
14
15
16
17
|
sudo coreos-installer install /dev/vda \
--ignition-url http://192.168.0.33:8080/bootstrap.ign \
--insecure-ignition \
--append-karg "ip=192.168.0.100::192.168.0.1:255.255.255.0:bootstrap.ocp4.hazel.com::none nameserver=192.168.0.33"
sudo coreos-installer install /dev/vda \
--ignition-url http://192.168.0.33:8080/master.ign \
--insecure-ignition \
--append-karg "ip=192.168.0.101::192.168.0.1:255.255.255.0:master0.ocp4.hazel.com::none nameserver=192.168.0.33"
sudo coreos-installer install /dev/vda \
--ignition-url http://192.168.0.33:8080/worker.ign \
--insecure-ignition \
--append-karg "ip=192.168.0.104::192.168.0.1:255.255.255.0:worker0.ocp4.hazel.com::none nameserver=192.168.0.33"
|
安裝完後重新開機,記得把開機順序改為從硬碟啟動,不要繼續從 ISO 開。(我當時沒有特別改開機順序,RHCOS 新版好像會自己選擇硬碟啟動)
階段三:Bootstrap 過程(自動化)
這個階段基本上就是等,Bootstrap 節點會先把自己起成一個暫時的 Control Plane,Master 節點向它報到並接手。
在 Bastion 監控進度:
1
| openshift-install wait-for bootstrap-complete --dir=~/ocp-install --log-level=info
|
看到 Bootstrap complete 之後:
- 把 HAProxy 設定裡
ocp_api_backend 和 ocp_mcs_backend 的 bootstrap 那行註解掉並 reload
- 可以關閉或銷毀 Bootstrap 虛擬機
1
| sudo systemctl reload haproxy
|
階段四:收尾與 Worker 節點加入
Worker 節點啟動後會發出 CSR (Certificate Signing Request),預設是 Pending 狀態,要手動 approve。
1
2
3
4
5
6
7
8
| export KUBECONFIG=~/ocp-install/auth/kubeconfig
oc get csr
oc get csr -o go-template='{{range .items}}{{if not .status.certificate}}{{.metadata.name}}{{"\n"}}{{end}}{{end}}' \
| xargs oc adm certificate approve
|
等待安裝完全結束:
1
| openshift-install wait-for install-complete --dir=~/ocp-install
|
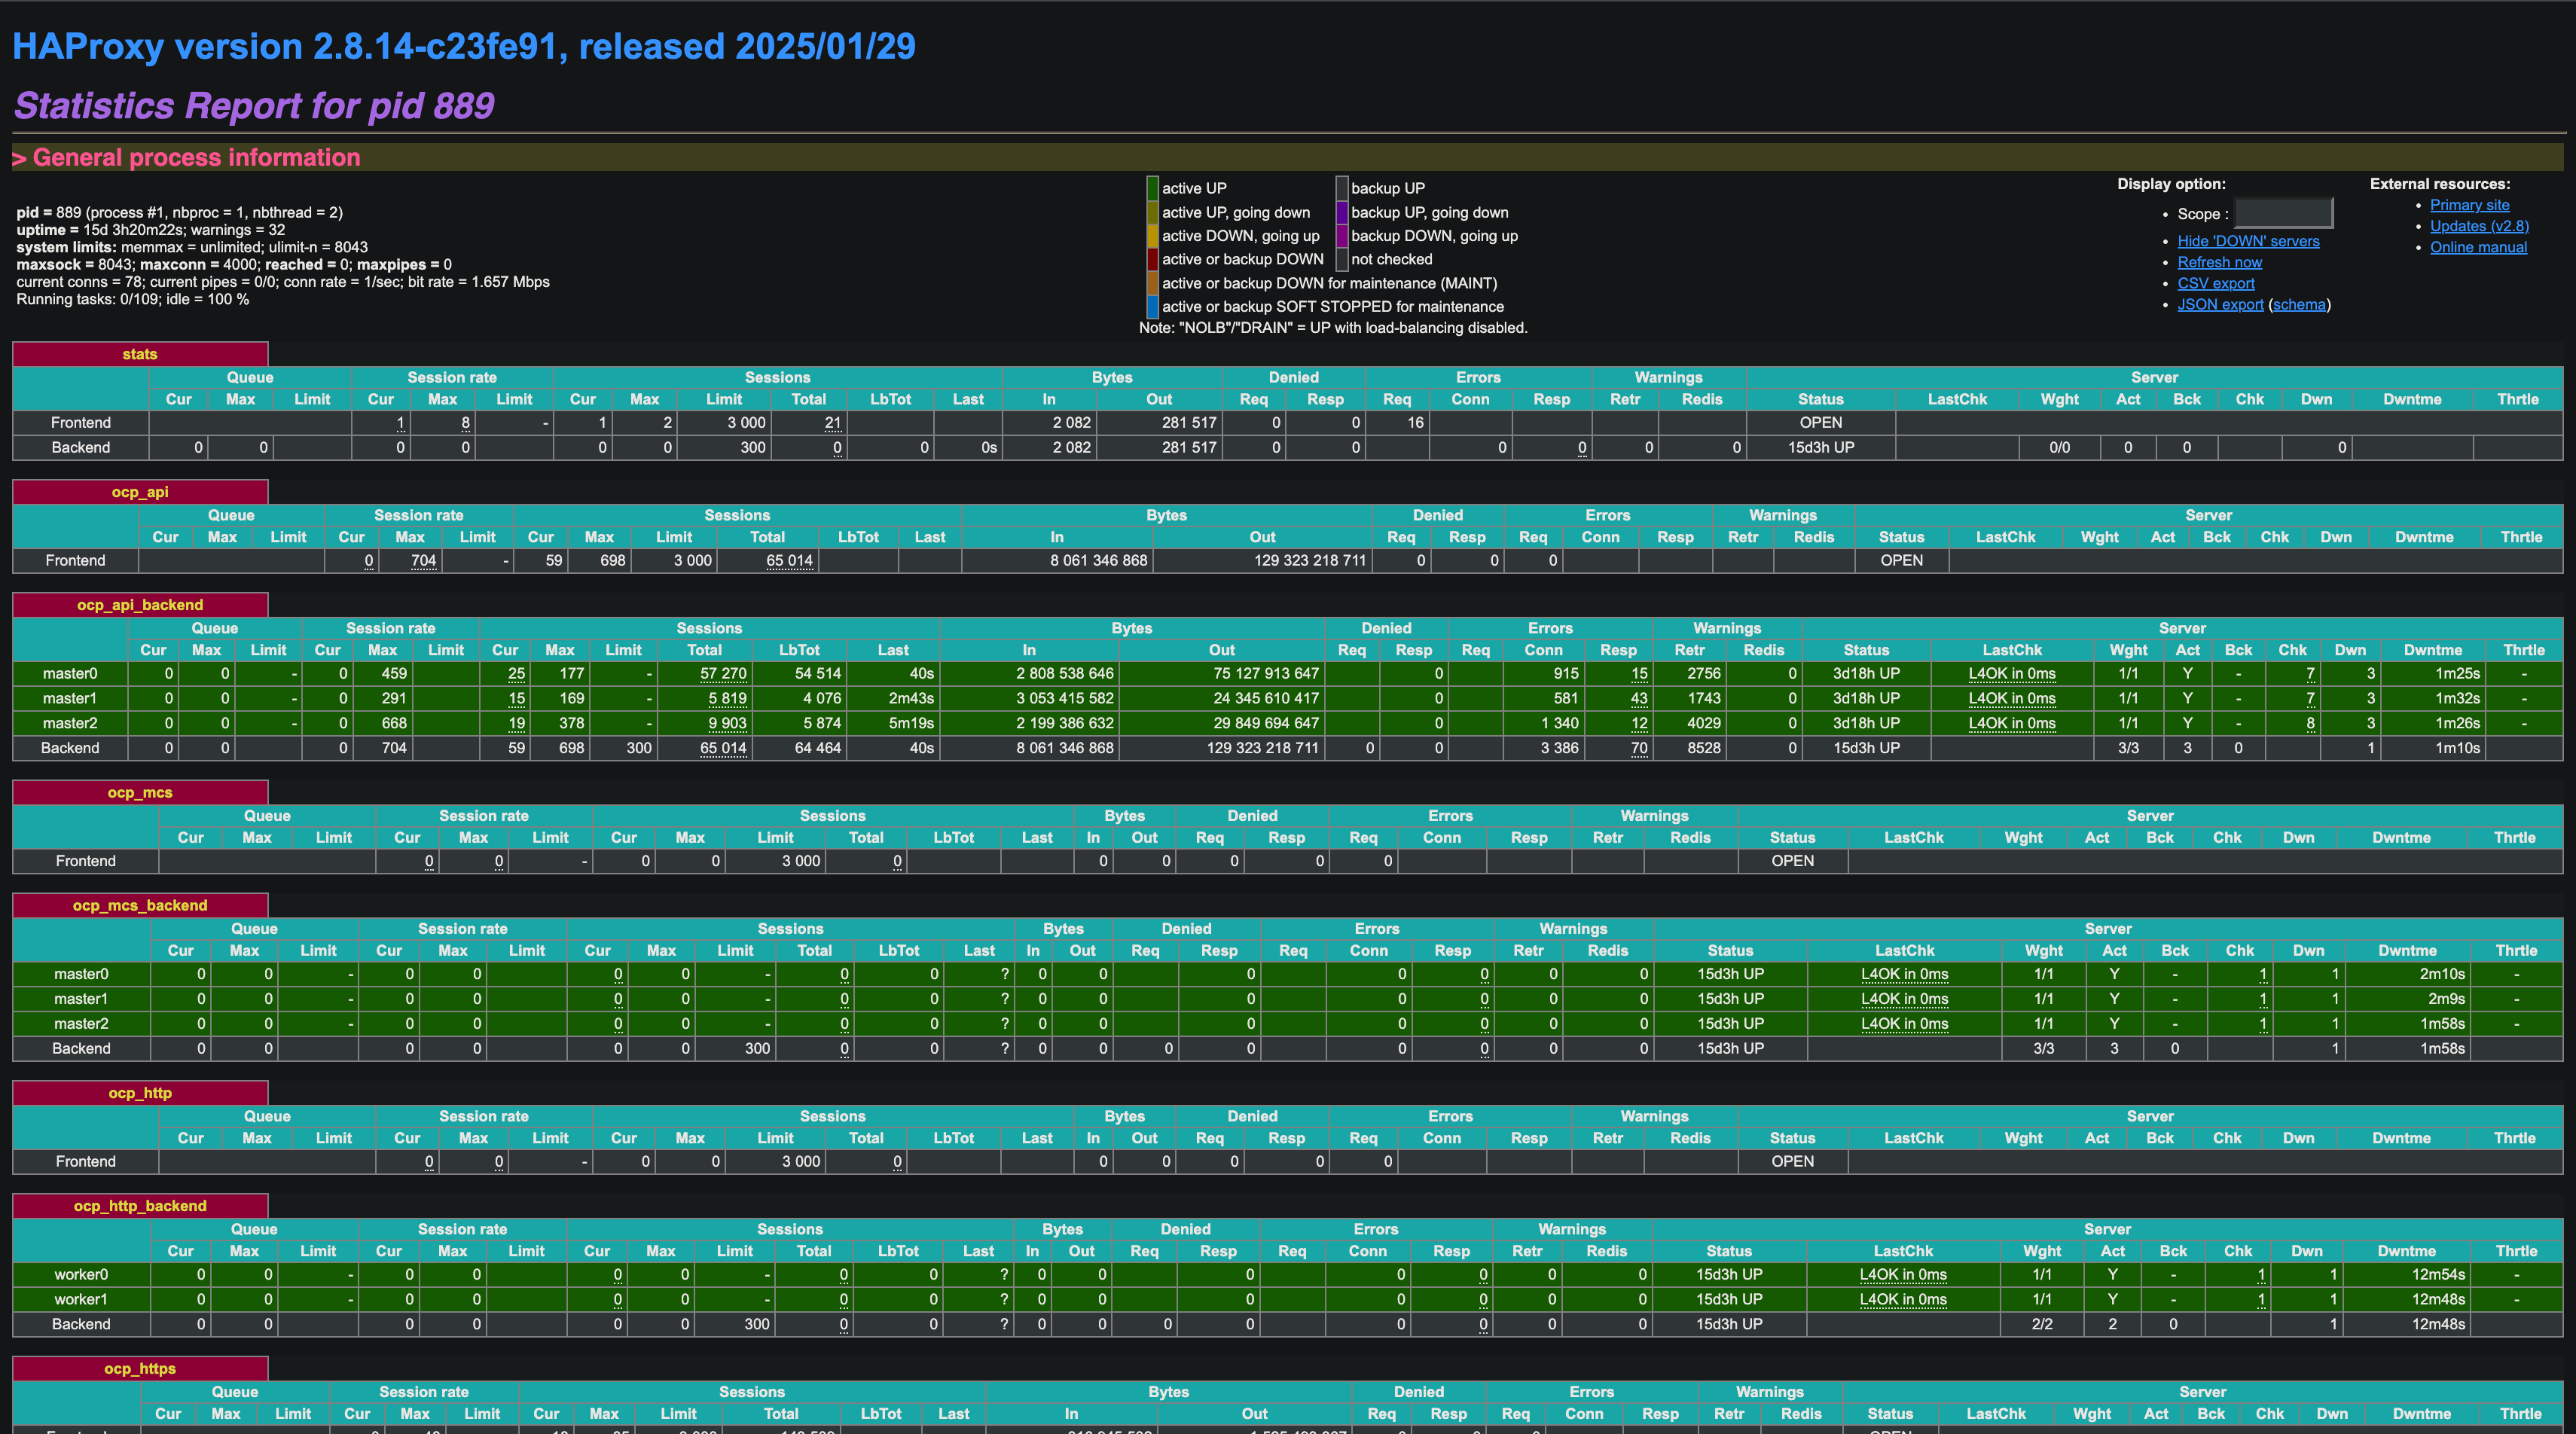
安裝過程可以從瀏覽器看到 haproxy 上列出的節點狀態,順利的話每個節點都會是 UP 狀態:
![]()
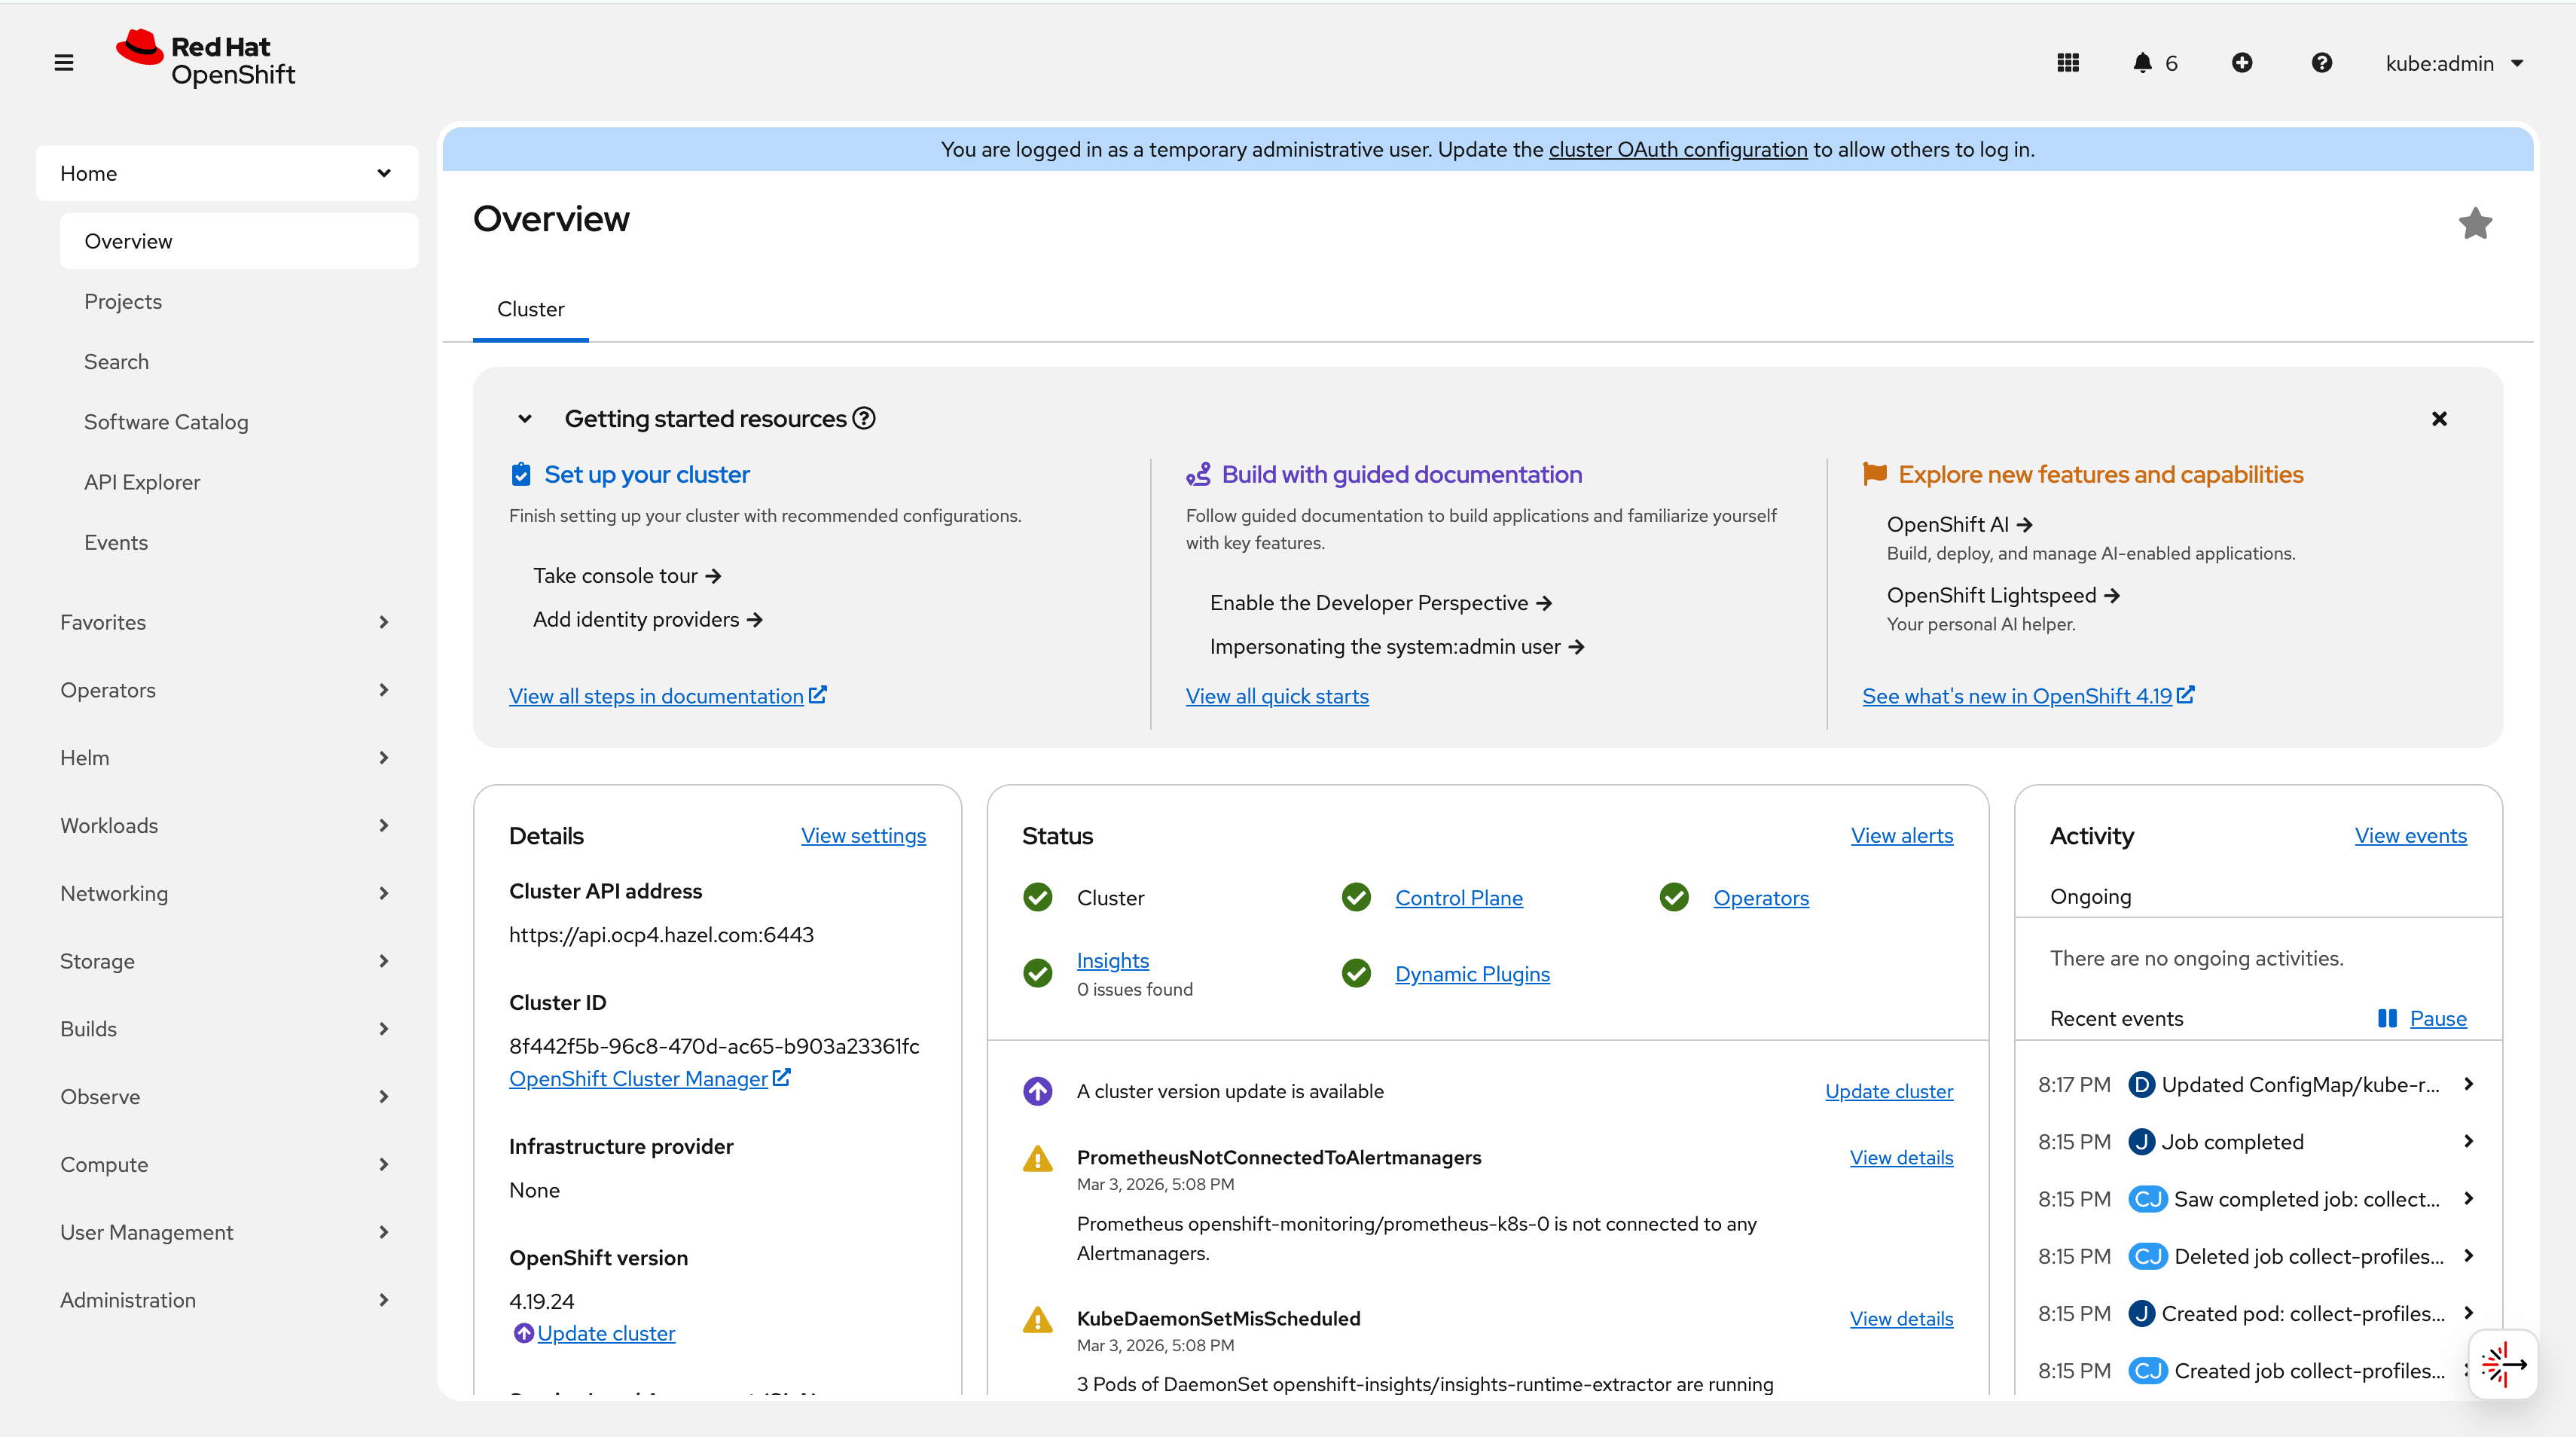
完成後用 kubeadmin 搭配 auth/kubeadmin-password 的密碼登入 Web Console。
![]()
我後來有更新到 4.19,所以版本號不太一樣。
最後收尾
macOS Split DNS(讓 Mac 直接解析實驗室域名)
我想要讓我的 Macbook 可以解析我自訂的域名,但是不想把整台 Macbook 的 DNS 都綁到 bastion 機器上,只要建一個 resolver 設定檔,讓 ocp4.hazel.com 的流量轉到 Bastion 的 BIND 就好,一般上網完全不影響:
1
2
| sudo mkdir -p /etc/resolver
echo "nameserver 192.168.0.33" | sudo tee /etc/resolver/ocp4.hazel.com
|
Debug:Router Pod 跑到 Master 節點上
router pod 亂跑的話,haproxy 上面的節點會呈現啟動失敗的畫面。
剛裝完發現 Ingress Router Pod 全跑到 Master 上,原因是 Ingress Operator 預設沒有指定 node selector。不要手動刪 Pod,要改 IngressController CR:
1
2
| oc patch ingresscontroller default -n openshift-ingress-operator --type=merge \
-p '{"spec":{"nodePlacement":{"nodeSelector":{"matchLabels":{"node-role.kubernetes.io/worker":""}}}}}'
|
套用後 Operator 會自動做 Rolling Update,把 Pod 遷移到 Worker 節點,不中斷服務。確認結果:
1
2
| oc get pods -n openshift-ingress -o wide
|